How to Change a Flat Tire
Posted Thursday, Nov 29, 2018
One thing you don’t want to have to learn on the side of the road is how to change a flat tire, so it’s best to learn the steps, and even practice, before you’re faced with a flat. If you’ve never changed a tire before, it may seem daunting, but it really is not that difficult. And, hey, the tools are provided for you. So, let’s begin.
 1. Park your vehicle on a hard, flat surface. This may be challenging if you’re cruising down the road when you have a flat, but you should be able to pull into a parking lot or emergency lane- just make sure you’re a safe distance from other traffic.
2. Put your car’s transmission into Park, or 1st or Reverse if you have a standard transmission, and engage the parking brake.
3. Wedge some large rocks or pieces of wood around the inflated tires to keep the vehicle from rolling forward or backward.
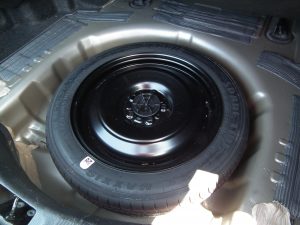
4. Locate your lug wrench, jack, and spare tire. For most vehicles, these items are going to be in the trunk- either under the trunk floor or in a side panel. However, some manufacturers become creative in the placement of these articles. I once owned an SUV in which the jack was stored in a compartment in the rear, but the jack handle was kept under the hood. If you cannot locate one of these items, look in your owner’s manual to see if your manufacturer is fond of Easter egg hunts. You may need to look in this manual in a moment anyway, so have it handy.
5. Using the lug wrench, “break loose” the lug nuts on the flat tire by turning them counterclockwise. Sometimes, the lug nuts are really tight, so you may have to literally stand on the wrench to break them loose. Do this before raising the car, for you’ll probably just spin the wheel instead of turning the lug nuts if the car is suspended.
6. Place the jack into the appropriate position; you may have to consult the owner’s manual for this. Most cars have specific points at which the jack should come into contact with the frame; sometimes they are marked and sometimes they simply appear as a notch in part of the frame. In either case, the manual will point out those locations.
7. With the jack resting firmly on the ground, raise the vehicle high enough to not only clear the flat but also to clear the spare. During and after this step, you must be very careful- you don’t want the car to move in any direction, or it could tip off of the jack. This is especially the case after the tire has been removed; the brake rotor on a falling car can act just like a guillotine to your fingers and toes.
8. Remove the flat tire and set it to the side.
9. Install the spare and begin replacing the lug nuts. Tighten them down by hand, and then tighten one lug nut with the lug wrench. Moving in a clockwise pattern, skip the next lug nut and tighten the third. Continue this star pattern until all lug nuts are tight. Again, you cannot fully tighten them while the car is suspended, but you can get them pretty snug.
10. Lower the car back to the ground and remove the jack.
11. Once again following the star pattern, completely tighten the lug nuts.
12. Replace all of the tools in their proper locations and put the flat in your trunk.
You’re now set to drive to a tire shop to either have your tire repaired or replaced. Keep in mind that the small spare “donuts” are not rated for high speeds or long distances- they are simply made to get you to the tire shop safely. If you drive them too long or too fast, they will probably fail; then you’ll need a spare for your spare, and most cars don’t come equipped with such. If you’d like to know more about tire ratings, read this article: Understanding Tire Numbers and Letters
Photo courtesy of reasonablerides.com