Guide to Cleaning Cloudy Headlights
Posted Friday, Jan 12, 2024
Restoring Clarity: A Guide to Cleaning Cloudy Headlights
As the sun sets and darkness envelops the roads, headlights become our guiding beacons. However, over time, these essential safety features can lose their clarity due to exposure to the elements, oxidation, and debris accumulation. Cloudy headlights not only compromise visibility but also diminish the aesthetics of your vehicle. Fortunately, with a little effort and the right techniques, you can restore their shine and brilliance. In this article, we'll guide consumers through the process of cleaning cloudy headlights, ensuring safer and more enjoyable nighttime driving.
Step 1:
Guide to Cleaning Cloudy Headlights
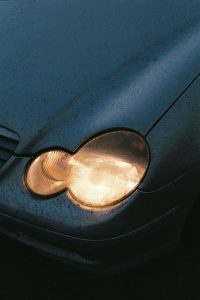
Inspection
Before diving into the restoration process, take a close look at your headlights to assess the level of damage. If the cloudiness is minor, you might get away with a basic cleaning. However, if the lenses appear heavily fogged or discolored, you may need to invest more time and effort.
Step 2: Gather Supplies
To clean cloudy headlights effectively, you'll need a few essential supplies. These include microfiber cloths, automotive soap, plastic or metal polish, masking tape, and a UV-resistant clear coat. Be sure to select products suitable for your vehicle's headlight material (glass or plastic).
Step 3: Cleaning
Start by thoroughly washing the headlights with automotive soap and water. Remove any dirt, grime, or bugs to prepare the surface for the restoration process. Pat the headlights dry with a clean, dry microfiber cloth.
Step 4: Polishing
To tackle the cloudy appearance, apply a small amount of plastic or metal polish onto another microfiber cloth. Gently buff the headlights in circular motions, covering the entire lens. The polish will help remove the oxidized layer, revealing a cleaner surface.
Step 5: Masking
Before applying the clear coat, protect the surrounding areas with masking tape to prevent any damage to the paintwork.
Step 6: Applying Clear Coat
Using a separate microfiber cloth, apply the UV-resistant clear coat to the headlights. This protective layer will not only enhance the appearance but also safeguard the lenses from future damage. Follow the manufacturer's instructions for the appropriate drying time.
Step 7: Final Touches
Once the clear coat has dried, remove the masking tape carefully. Inspect the headlights for any missed spots or imperfections, and repeat the process if necessary.
Cleaning cloudy headlights is an essential maintenance task that every vehicle owner should prioritize. By following these simple steps, you can enhance your headlights' clarity, ensuring safer and more enjoyable nighttime driving experiences. Regular maintenance will not only improve visibility on the road but also extend the lifespan of your headlights. So, invest a little time and effort, and let your headlights shine like new, guiding you through the darkest of nights.
-
Recent Posts
- Benefits and Weaknesses of Car Warranties February 23, 2024
- Maximizing Your Car’s Trade-In Value February 16, 2024
- Exploring the Pros and Cons of Hybrid Vehicles February 9, 2024
- A Brief History of Groundhog Day February 2, 2024
- Car Scratch Repair In 5 Simple Steps January 26, 2024