How to Check Your Car’s Oil Level
Posted Wednesday, Nov 28, 2018
As I stated in a post on tire pressure, often, we jump into our vehicles and motor off without thinking about checking anything on our cars beforehand. It is important to know how to check your car’s oil level. To be sure, cars have a warning light to signal low oil pressure, but do you really want to place the health of a $4000 part in the hands of a light that can malfunction? Also, that warning light usually signals low oil pressure (too little oil) but not excessive oil pressure (too much oil). For that reason, I feel it to be necessary for you to know how to check your car’s oil level, and for you to do that on occasion. Besides, it’s really simple and only takes 3-4 minutes, unless you have to add oil. What’s the harm in incorrect oil levels? Too little oil leaves your engines parts without enough lubrication; they then grind away at each other until they’re worn to the point of needing replacement. With too much oil, the pressure may build to the point of blowing out seals or being forced around the compression rings and into the cylinders. Neither of those scenarios is attractive, so let’s get started by following these steps:
 1. Make sure that your auto is parked on level ground for the most accurate reading.
2. Check your owner’s manual to see if your car’s oil should be checked with a cold or warm engine and proceed accordingly.
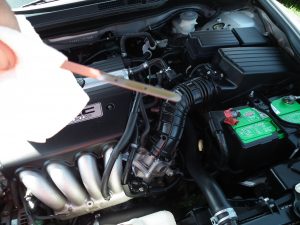
3. Open your vehicle’s hood and locate the oil dipstick, which shouldn’t be confused with the automatic transmission dipstick. There’s really no way to give you tips on this. On some cars, the oil dipstick has an orange handle while the transmission dipstick has a yellow handle. On other makes, both dipsticks have yellow handles, but the transmission dipstick is labeled. On others, both are labeled, yet on some, neither is labeled. The safest way is to note where the dipstick is routed; if it goes into the block, it’s the oil dipstick, but if it goes into the tranny, it’s, surprise, the transmission dipstick.
4. Pull out the oil dipstick and wipe it clean with a paper towel or rag. While doing so, pay attention to the color of the oil. It should appear brown to black. If it looks like coffee with lots of cream, coolant is getting into your oil in some way- have it checked out quickly. At this point you should also examine how the dipstick is marked; some have two small holes, some have letters (L and H or MIN and MAX), and some have a section of hash marks. I recommend you locate this now because an excessive amount of oil may completely cover the markings when you replace the dipstick, which is the next step.
5. Replace the dipstick completely.
6. Remove the oil dipstick again and note where the upper level of oil falls on the dipstick(technically, this is how to check your car’s oil level). If it’s between the marks, you can replace the dipstick and skip to step 9. If the level is below the lower mark, you’ll have to add oil; replace the dipstick and move to step 7. If the level is above the upper mark, and you know that it’s simply too much oil, you’ll need to remove oil; jump to step 8. However, excessive oil may signal other problems, like the coolant seeping into the oil as mentioned above; you should probably have a mechanic inspect your car.
7. Under filled. Remove the oil fill cap which should be on your engine’s valve cover; often it’s marked with the recommended oil weight to be used, like 5W-20. For a detailed look at those oil weight numbers, read this post: What Do Those Numbers on Motor Oil Cans Mean? Using a funnel (although you don’t have to), add about ½ quart of the recommended oil. Once again, check the oil level on the dipstick, and add more oil, in a small amount, if needed. Continue adding and checking until it reads at the correct level, then move to step 9.
8. Over filled. This process isn’t too difficult if you happen to have a section of ⅛” hose and a very large syringe without a needle (if you don’t, maybe you should buy these two items after reading this). Simply pace one end of the hose over the end of the syringe. Now insert the other end of the hose into the metal tube where the dipstick goes. As you pull on the syringe’s plunger, the vacuum should draw oil up through the hose and into the syringe. Discard this oil into some handy container and then check the oil level on the dipstick, and remove more oil, one syringe full amount, if needed. Continue removing and checking until it reads at the correct level, then move to step 9.
9. Make sure the dipstick is replaced and fully inserted.
10. Close the hood and motor on with the gratification that you know how to check your car’s oil level.
Through these simple steps, you can ensure two things: your vehicle has the correct amount of oil, and your vehicle has no coolant seeping into the oil. This is but a small part of preventive maintenance, but it is well worth it.
Photo courtesy of reasonablerides.com