Buying A Used Car- Part 6: Test Drive- Interior
Posted Wednesday, Nov 14, 2018
In this article, we’ll continue by outlining the second major part of a test drive. Once you’re satisfied with your examination of the exterior, it’s time to move to the interior. As a side note, though, you should have left the car running to this point to allow it to reach operating temperature. Before sitting in the car, open each door and look at the interior. Are there any stains, rips, or tears in the seats or carpet? Are the door panels intact? Are there any missing headrests? Are all the floor mats present? You then have to decide if any flaws here are deal breakers; sometimes a stain/tear could be overlooked if you’re getting a great deal otherwise. Now, it’s time to enter the vehicle.
While getting into the vehicle, ask yourself, “How accessible is the car?” In other words, is it easy for you to get in and out of? If you’re tall, some vehicles present a challenge for entry/exit if the distance from the seat to the top of the door opening is short. As much as I love the new Supra, this tends to be an issue in many reviews of that car. Does it sit too low/high? If you have bad knees or are older, a low vehicle may prove troublesome; likewise, climbing into a jacked-up F250 on a daily basis may grow old.
 As you sit in the driver’s seat, it’s logical to move your inspection from left to right. Begin by adjusting the driver’s seat so that you’re comfortable, but make sure to check all of the seat adjustment controls: forward/backward, up/down, recline/raise, lumbar support, and any others that may be equipped. Next, move to the window/lock controls on the driver’s door making sure each performs its respective job.
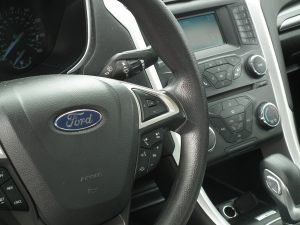
To the left of the steering column, most cars have the mirror adjustment, headlight control, dimmer switch, and possibly wiper controls. These can be mounted either on the dash or on a stalk attached to the steering column. In any case, check all of the controls and switches to the left of the wheel, connected to the left of the steering column, and then those connected to the right of the steering column. After all of those have been checked for functionality, move to those controls in the center, i.e., the radio and climate control, navigation (if equipped), gear selector, etc. Do all of the functions on the radio work properly (bring a cd and mp3 player to check the cd player and auxiliary connection)? Do all of the speakers emit clear sound? Next, move to the climate control. Do the controls work, and does the heat blow hot air while the a/c blows cold air? Does the heat or air smell as though the in-cabin air filter should be replaced?
Now that you’ve checked all of those controls, you need to check the passenger door panel controls followed by the passenger seat controls. If the car has window/lock controls on the back doors, check those as well. While inside the car, it’s also a good time to check the dome lights and instrumentation. Depending on the particular car, there may be additional items to inspect. Just remember to ask yourself, “In the end, can I live with this problem or issue?” Once you’ve finished examining the interior, it’s time to move to the mechanical aspect of the car.
Photo courtesy of reasonablerides.com